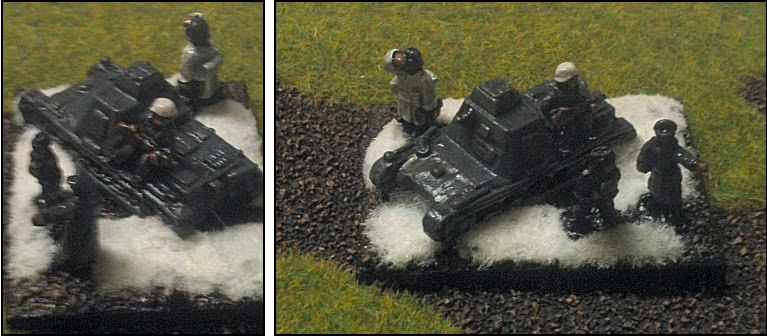
THE RUSSIAN T-70
COMPANY, LED BY A SOVIET CAPTAIN, COMES UNDER HEAVY FIRE. WHILST TWO UNITS OF
GERMAN HEER ACCOMPANY THE WAFFEN-SS (ALL IN WHITE SMOCKS) AS THEY PUSH TOWARDS
THE RUSSIAN LINES.
With the German armour push momentarily abated, the Russians took the opportunity to counter-attack with their own Light Tanks. Their T-26 tanks, supported by medium mortar fire (as a result of the presence of an ‘NKVD’ officer) forced the Panzer company in the centre of the battlefield back even further towards the German deployment line. Encouraged by the urgent withdrawal of the German Mark I tanks, the Russians deployed more ‘Angels of Mercy’ to tend to the wounded crew of their T-70 tanks. And even as the female medics treated the injured, the Soviet Light Tanks opened up upon some Heer accompanying the Waffen-SS.
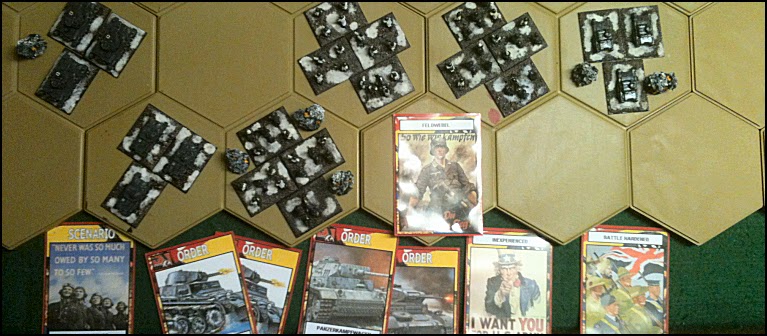
GERMAN PANZER MARK I
TANKS APPROACH THE NORTH-EASTERN HILL, ONLY TO FIND THE OBJECTIVE IS OCCUPIED
BY A UNIT OF RUSSIAN REGULAR SOLDIERS SUPPORTED BY A LIGHT MACHINE GUN TEAM.
Suddenly all attention focused on the Captain led Light Tank
company, as the German Panzer Mark III’s moved ominously closer towards them,
whilst ‘Doctrine & Training’ allowed the Waffen-SS Light Machine Gun Team
to provide covering fire. Unfortunately the T-70 armour was penetrated and
Russian casualties increased significantly with the decision that the vehicle
was ‘On Fire’.
Fortunately
the Light Tanks were declared the ‘Defenders of Russia’; a unique Soviet Army
Tactic card that allows any unit suffering from its full quota of fatigue to
automatically recover from one of its casualties. But then the nearby Panzer
Mark I tanks performed a ‘Surprise Charge’ (which prevents an opposing player
from deploying their own tactic cards as a response) and crashed into the
Soviet armour formation, hoping to break the buckling tank crews. Grimly the
battered T-70’s weathered the assault and, inspired by their heroic Captain,
momentarily repulsed the German Light tanks.
THE ‘DEFENDERS OF
RUSSIA’ MOMENTARILY RECUPERATE BEFORE THEY ARE CAUGHT WITH THEIR PANZERS DOWN
BY A GERMAN ‘SURPRISE CHARGE’. INSPIRED BY THEIR CAPTAIN THE SOVIET ARMOUR
RESISTS THE GERMAN BATTERING.
Momentarily inspired by the defiance of their T-70 Light
Tanks, the Russian Medium Mortar Team prepared to shell the approaching German
forces further still, but fell victim of ‘FUBAR – Panic’, and attempted to
retreat instead. Realising that a chance to bloody the German armour once and
for all may be about to be lost, the Soviet Cavalry brigade spurred on their
horses towards the Panzer Mark I tanks still licking their wounds amidst the
rough terrain (see rocky terrain).
Disaster
appeared to have momentarily struck when the German tanks declared ‘Opening
Fire’ and seized the opportunity to fire upon the riders before they could
engage them. One of the horses crumpled to the ground, but the Russians were
‘Fanatics’ and could therefore ignore the first casualty the unit suffered, as
it didn’t have any fatigue at the time. Pouring submachine gun fire into the
German Light Tanks the Soviet Cavalry quickly penetrated the weak armour and a
further cheer went up as the hit set the tank ‘On Fire’. With more casualties
than its fatigue quota would allow, the Panzer Mark I company broke and was
removed from the battlefield.
HORSE VERSES PANZER…
THE GERMAN LIGHT TANKS MOMENTARILY HELD THE INITIATIVE BY ‘OPENING FIRE’, BUT
THEN BROKE UNDER THE STRAIN OF THE RUSSIAN CAVALRY ‘FANATICS’ ASSAULT AND THE
DAMAGE THAT IT CAUSED.
Furious at
the loss of one of his Panzer Mark I companies, Marshal Gerd von Rundstedt
ordered a counter-attack immediately, and whilst pushing a unit of Heer west to
accompany his Panzer Mark III’s, he utilised ‘Doctrine & Training’,
‘Hitler’s Buzzsaw’ and ‘Nazi Party Bully Boys’ to sting the Waffen-SS into
action and send a hail of bullets into the Soviet T-70 tanks. Amazingly the Russian armour formation remained intact,
though another casualty would clearly break the beleaguered tanks crews.
Once
gain the Soviet Cavalry took it upon themselves to lead the Red Army towards
victory and charged into the Panzer Mark III tanks, submachine guns blazing.
Bullets pinging off their armour, the German armour withdrew from the assault,
providing the Heer a clear line of sight on the Russian horsemen. Once again
‘Hitler’s Buzzsaw’ tore into the Soviets and few survived the withering fire
from the Light Machine Gun Team.
CHARGE OF THE SOVIET
BRIGADE - HAVING DISPATCHED A COMPANY OF PANZER MARK I TANKS, THE RUSSIAN
HORSEMEN ENGAGE SOME TOUGHER ARMOUR, BUT ARE WHITTLED DOWN BY A UNIT OF HEER
AND ‘HITLER’S BUZZSAW’.